반응형


작성일: 2024년 4월 9일


Amazon AWS, Microsoft Azure, Google GCP, Oracle Cloud Infra 등 CSP에서 Compute resource를 생성하려고 보면,

이 Compute instance(또는 VM instance)를 생성한 것 때문에 비용이 얼마나 되는지 감을 잡기가 어렵다.


마침, Oracle Cloud의 연간 Credit 구입한 것이 많이 남아 있고, 5일 후에 Expire되기 때문에 남는 Credit을 소진해볼겸

VM instnace를 Scale-up, Scale-down하면서 비용 증가/감소 정도를 체크해봤다.


1개 VM instance를 대상으로 CPU/Memory Scale-up 수행 후 비용 증감을 체크

초기 VM instance의 Spec Scale-up 이후의 Spec 비용 증가분(Delta)
CPU: 1 core (2 thread)
MEM: 2GB
Storage: 50 GB (Boot volume)
CPU: 8 core (16 thread)
MEM: 128 GB
Storage: 50 GB (Boot volume)
11,479 원   (Daily Cost)


참고:
  CPU 종류: AMD EPYC 7J13
  CPU Caches: 
      L1d:  512 KiB (8 instances)
      L1i:   512 KiB (8 instances)
      L2:   4 MiB (8 instances)
      L3:   32 MiB (2 instances)


위에 내가 실제로 VM instance를 Scale-up한 이후의 비용 증가분을 계산한 것은
클라우드 테넌트 계약 조건과 현재 원/달러 환율 따라 30% 정도 차이가 날 것이다.
특히 클라우드 테넌트 계약시, 3년 이상 장기 계약한 경우 많은 할인율이 적용되서  Scale-up에 대한 증가분이 크지 않을 수 있다.
1년 단위로 단기 계약한 테넌트라면, CPU/Memory를 Scale-up할 때 비용 증가분이 위의 계산 결과보다 클 수 있다.


반응형


virsh, virt-install 명령 테스트한 날짜: 2023년 3월 6일


KVM을 사용하다보면, Virt-Manager라는 GUI 툴이 조작하기 편해서 계속 Virt-Manager만 사용하게 된다.

그런데 가끔 SSH 터미널만 사용할 수 있는 환경이거나 CLI Command만 이용해서 Script를 작성할 때는 virsh를 꼭 사용해야 한다.


Virtual Machine 생성하기 (그리고 VM에 OS 설치하기)

##
##  2023년 1월에 실제 Ubuntu 설치할 때 사용했던 명령.
##   참고: --disk 옵션에 기존에 사용했던 qcow image file을 사용하면 kernel을 못 찾는다는 에러 발생.
##        원인은 아직 모르겠음.
##   참고: 아래 명령을 수행하고 대략 55초 정도 지나야 Console에 text message가 출력된다.
##        (내가 사용한 HW Spec: i7-11700, 64GB)
##        따라서 느긋하게 기다려야 제대로 설치가 가능하다.
##

## 참고: size 단위는 GB.

## Case: OS 설치하면서 VM instance 시작하기
##       (주의: OS 설치하면서 VM start 할 때는 --osinfo 옵션을 빼야 한다.)

$ virt-install \
  --name my-vm \
  --ram 4096 \
  --vcpus 2 \
  --disk /mnt/sda1/virtual_storage/waas.qcow2,size=100 \
  --disk /mnt/hdd0/virtual_machine/harbor-2nd-storage.qcow2,size=500 \
  --graphics none \
  --network network=br-ex \
  --console pty,target.type=virtio \
  --autoconsole text \
  --location /home/iso/ubuntu-22.04.1-live-server-amd64.iso


## Case: 기존 사용했던 VM 이미지를 이용하여 VM instance 기동하기.

$ virt-install \
  --import \               ## 기존 VM image 파일을 이용하겠다는 옵션
  --osinfo ubuntu22.04 \   ## 이 osinfo 옵션을 꼭 추가해야 한다.
  --name my-vm \
  --ram 4096 \
  --vcpus 2 \
  --disk /mnt/sda1/virtual_storage/waas.qcow2,size=100 \
  --graphics none \
  --network network=br-ex \
  --console pty,target.type=virtio \
  --autoconsole text


##
## CPU Pinning, Hugepages 설정이 필요해서 사용했던 명령.
##

$ virt-install --import \
  --name my-machine \
  --vcpus 4 \
## CPU Pinning  
  --cpuset=2,4,6,8,10,12,14,16,18,20,22,24,26,28,30,32 \
  --memory=4096 \
## Hugepages  
  --memorybacking hugepages=on \
  --numatune 0 \
  --disk /mydir/my-machine.qcow2 \
  --network bridge=my-br \
  --network bridge=ems-br \
  --os-variant rhel7.9 \
  --noautoconsole
  
  
  ##
  ## 주의:
  ##  아래 --osinfo, --os-variant 옵션을 사용하면 VM instance 생성할 때 오류가 발생한다.
  ##  꼭 필요한 옵션이 아니니까, 아래 2가지 옵션을 사용하지 않는 것이 좋다. (2023년 1월 현재)
  ##    --osinfo ubuntu22.04
  ##    --os-variant ubuntu22.04
  ##
  
  
  ##
  ## 주의:
  ##  VM instance 내부에서 OS 설치가 끝나고, 자동 reboot되어야 하는게 정상이지만
  ##  가끔 OS termination 단계에서 실패하고 멈춘 경우가 있다.
  ##  reboot 시도 후 30초 후에도 console 화면의 변화가 없다면
  ##  과감하게 VM instance destroy를 시도한다.  (아래 명령을 사용)
  ##  
  $  
  ##


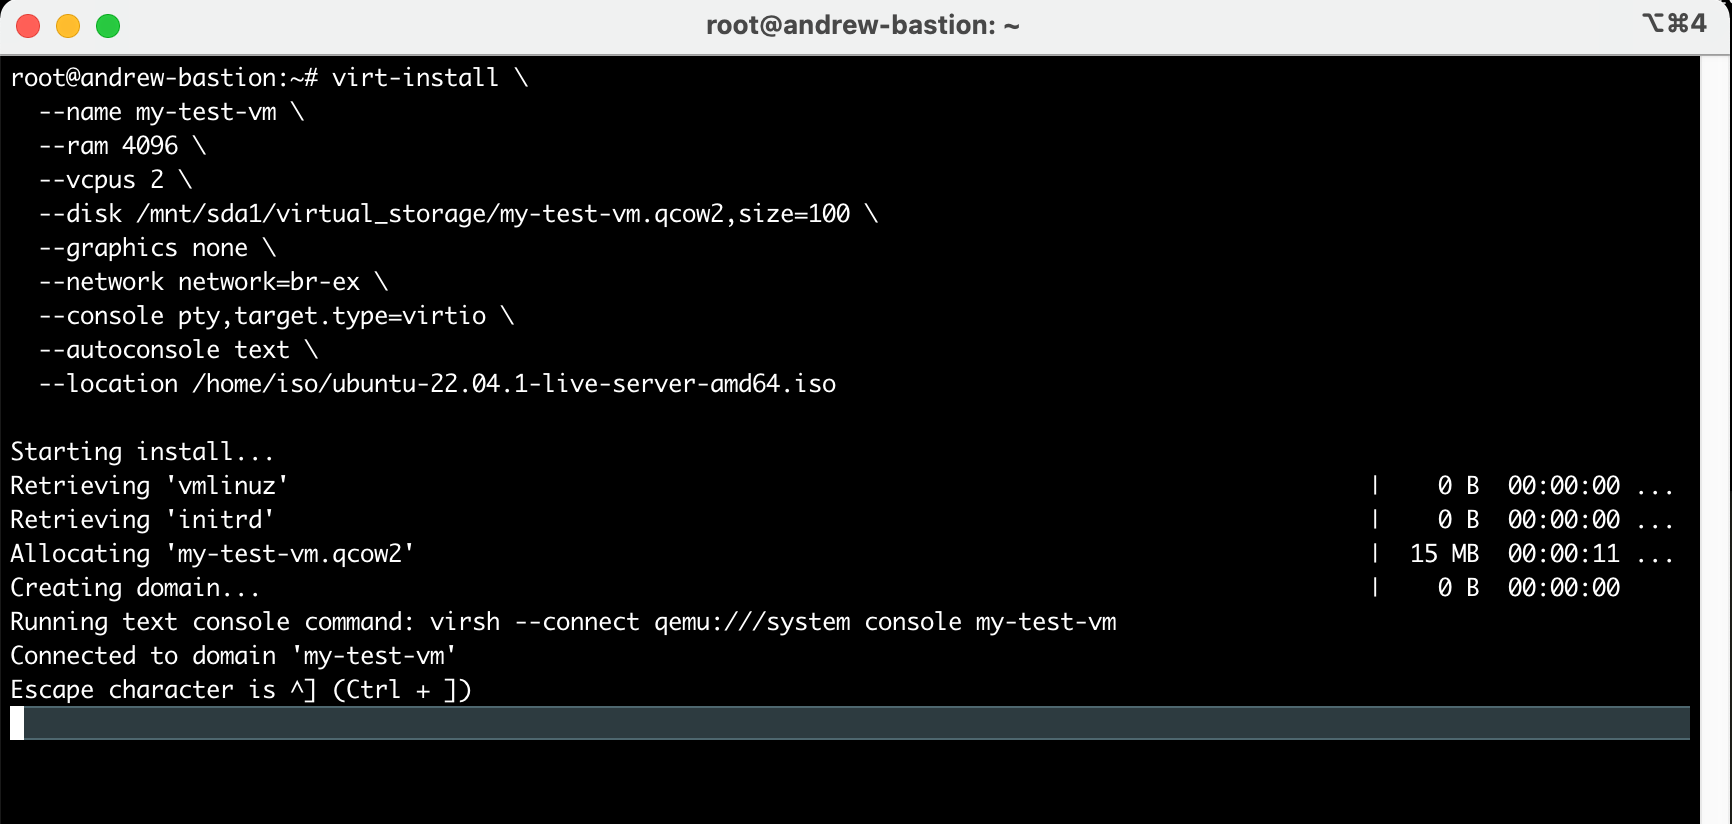
위 `virt-install` 명령을 실행하면, 바로 아래 화면이 출력되고

이 화면에서 대략 55~60초 정도 기다려야 다음 설치 화면으로 넘어간다.


위 화면에서 대략 55~60초 정도 기다리면, 드디어 아래와 같이 OS 설치 시작 화면이 나온다.


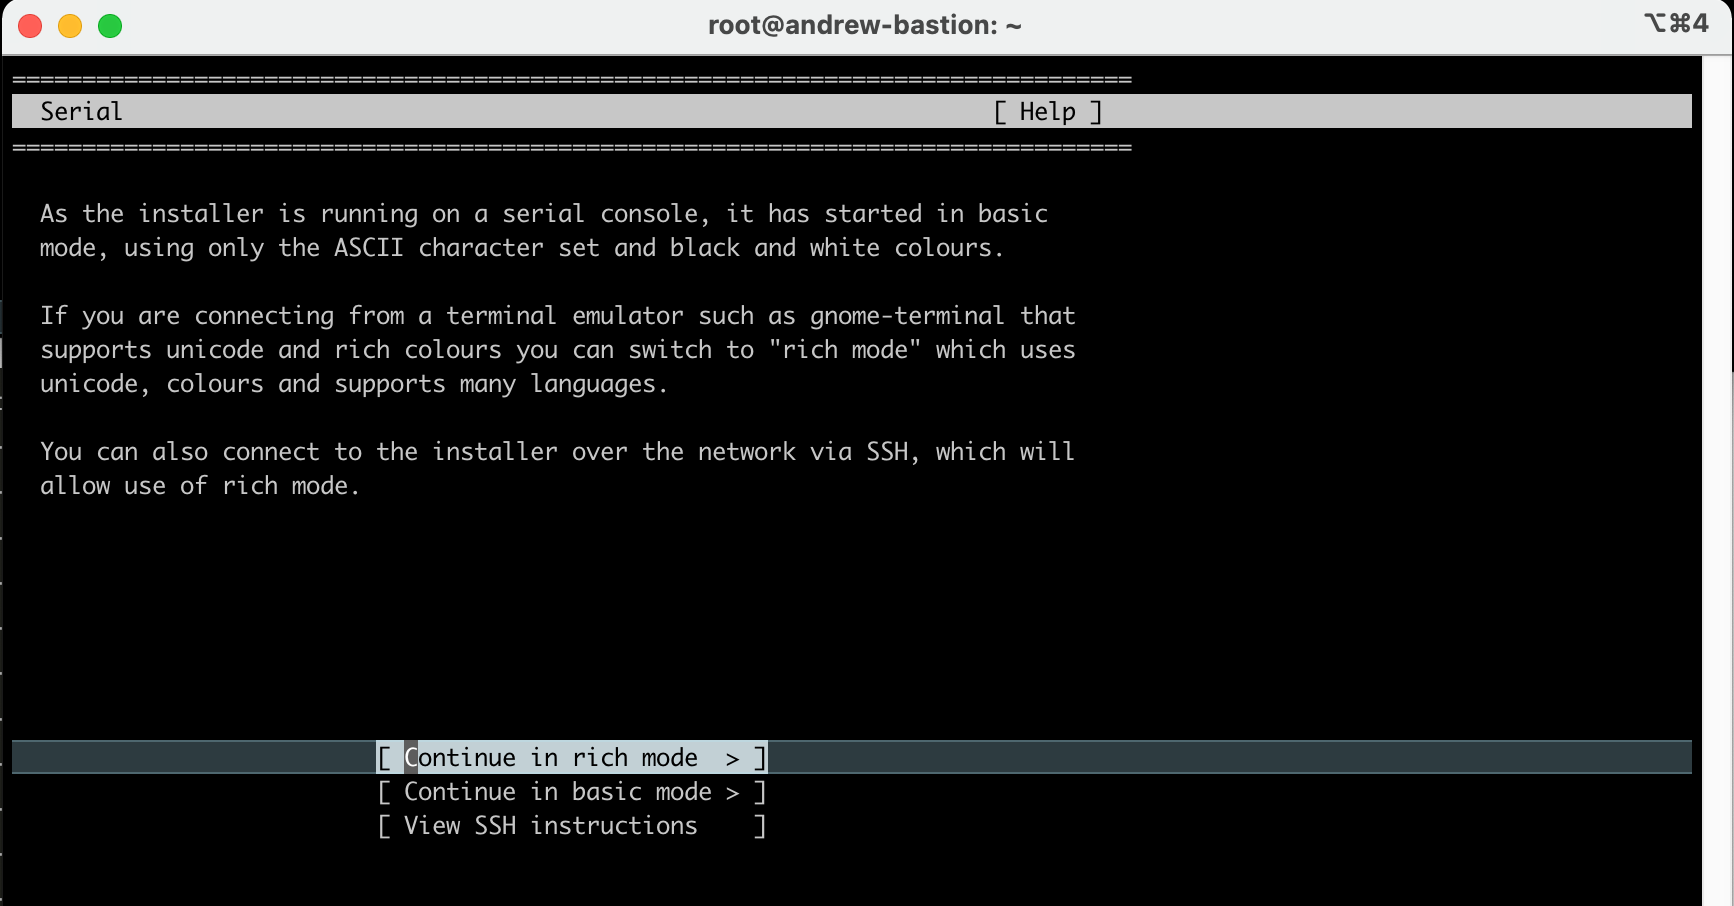
비록 Text Terminal 이지만, 조금이라도 예쁜 설치 화면을 원하면 "rich mode"를 선택한다.

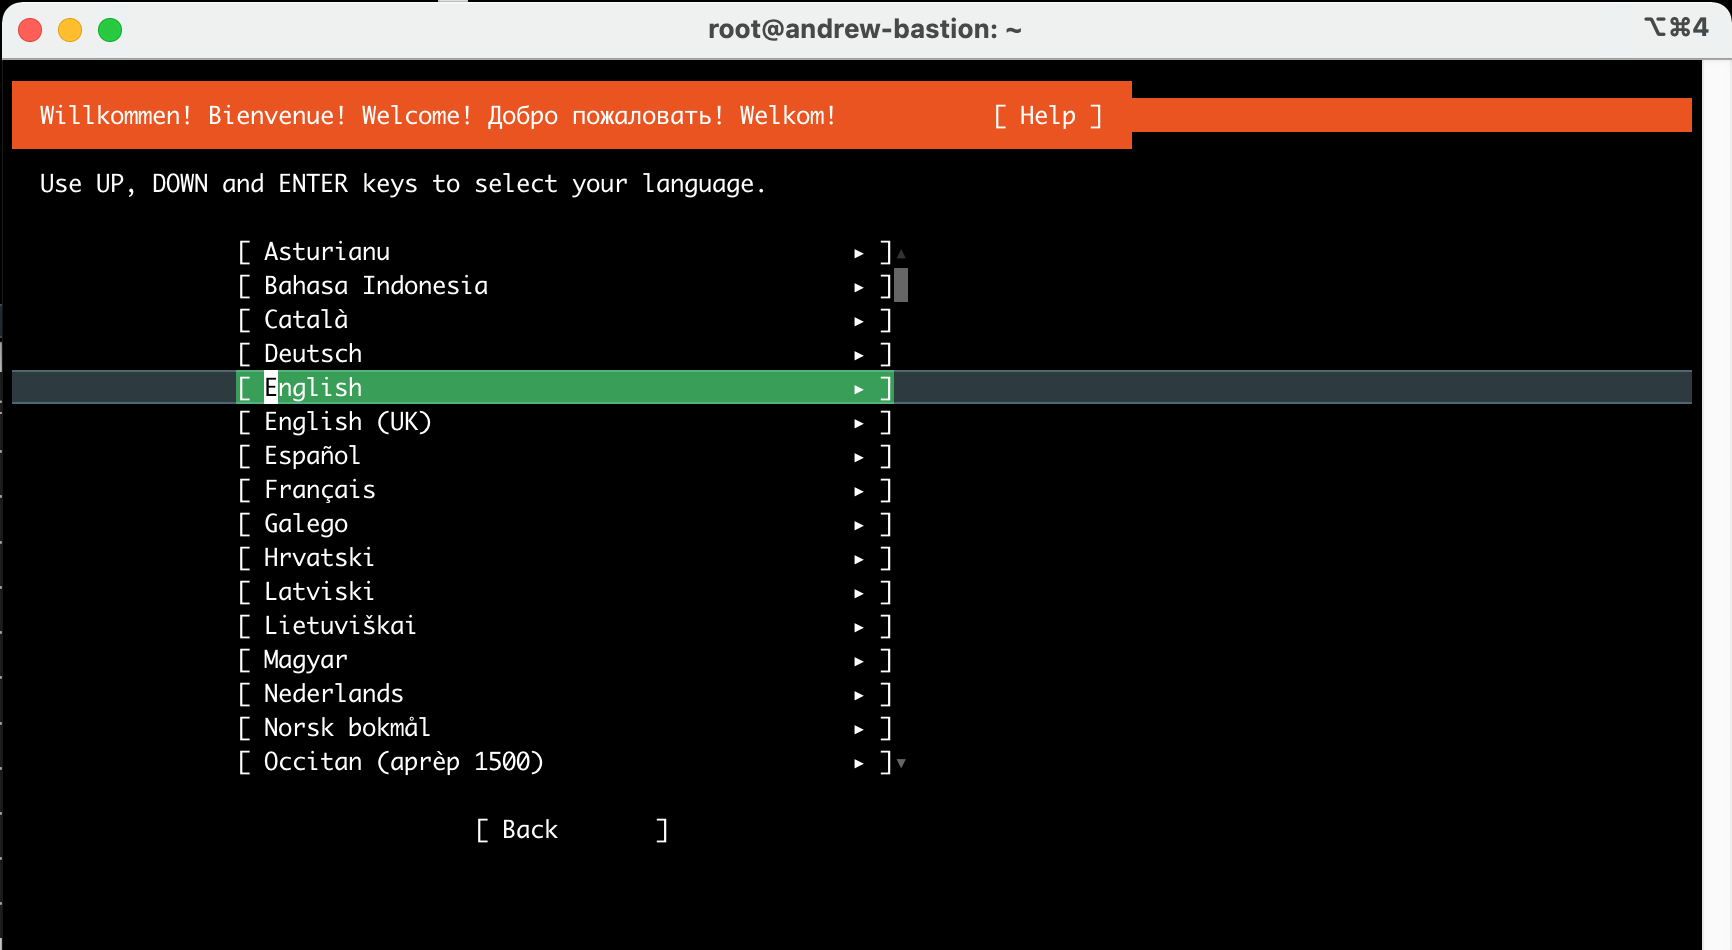
이후부터는 일반적인 Ubuntu OS 설치 절차와 같다.


Virtual Machine 목록 보기

$  virsh list --all
 Id   Name     State
-------------------------
 1    x-node   running
 -    am0      shut off
 -    aw0      shut off
 -    aw1      shut off
 $


Virtual Machine 기동하기

##
## am0 가상 머신을 기동하기
##

$  virsh start am0
Domain am0 started


##
## am0 가상 머신이 기동되었는지 확인하기
##

$  virsh list --all
 Id   Name     State
-------------------------
 1    x-node   running
 2    am0      running
 -    aw0      shut off
 -    aw1      shut off
$


Virtual Machine 종료하기

##
## Graceful Termination of VM instance
## (참고로, 아래 숫자 2는 VM의 ID이다)
##

$  virsh shutdown 2
Domain 2 is being shutdown

$


##
## VM instance 강제 종료
## (참고로, 아래 숫자 2는 VM의 ID이다)
##

$ virsh destroy 2


##
## VM instance 삭제하기
##
$ virsh undefine vm-name


Virtual Machine의  Console에 접속하기

$  virsh console x-node
Connected to domain x-node
Escape character is ^]

CentOS Linux 8
x-node login: root
Password: ......

[root@x-node ~]# _


qcow2 image file size 조정 (resize)

##
## 원하는 size로 vm image를 재조정할 수 있다.
## 최초에 작게 만들어진 volume image 용량을 더 크게 늘리기 위해서 사용한다.
##

$ qemu-img  resize  myvm.qcow2  100G


##
##  아래 명령과 같이 수행하여 기존 VM image에서 빈 공간을 제거하고 size를 줄일 수 있다.
##  보통 qcow2 파일을 다른 장비로 옮길 때, vm image size를 줄이기 위한 용도로 사용된다.
##  참고: 원본 qcow2 이미지 파일은 유지되므로 별도로 백업하지 않아도 된다.
 
$  qemu-img convert -O qcow2 source_image.qcow2 shrunk_image.qcow2


##
## volume image 정보를 열람한다.
##

$ qemu-img  info    myvm.qcow2


qcow2 image 파일 생성하기

##
## 만약 qcow2 type의 virtual volume을 만들고 싶다면 아래와 같이 명령을 수행.
## Volume size는 250GB로 지정했지만, 실제로는 qcow2 파일에 meta data만 생성하기 때문에
## 실제 사이느는 1MB 밖에 안 되고, 시간도 3초 정도 밖에 안 걸린다.
##

$  qemu-img  create  -f qcow2  my-virtual-volume.qcow2  250G


VM의 OS Type 전체 목록 열람하기

$  virt-install --osinfo list
...
ubuntu-lts-latest, ubuntu-stable-latest, ubuntu22.04, ubuntujammy
ubuntu21.10, ubuntuimpish
ubuntu21.04, ubuntuhirsute
ubuntu20.10, ubuntugroovy
ubuntu20.04, ubuntufocal
...
$


기존 VM instance에 disk 추가하기

$ virsh edit my-vm

... 중간 생략 ...

  <devices>
    <emulator>/usr/bin/qemu-system-x86_64</emulator>
    <disk type='file' device='disk'>
      <driver name='qemu' type='qcow2' discard='unmap'/>
      <source file='/var/lib/libvirt/images/my-vm-a.qcow2'/>
      <target dev='vda' bus='virtio'/>
      <boot order='1'/>
      <address type='pci' domain='0x0000' bus='0x05' slot='0x00' function='0x0'/>
    </disk>
    ##
    ## FIXME: 이 부분을 추가한다.
    ##
    <disk type='file' device='disk'>
      <driver name='qemu' type='qcow2'/>
      <source file='/opt/virtual_storage/vol_01.qcow2'/>
      <target dev='vdb' bus='virtio'/>
      <address type='pci' domain='0x0000' bus='0x09' slot='0x00' function='0x0'/>
    </disk>
    
... 중간 생략 ...

$ virsh reboot my-vm

## 또는 아래와 같이 hypervisor를 restart한다.

$ systemctl restart libvirt-bin


위 방식과 다르게 virt-install 명령으로 disk를 추가하여 VM instance를 재시작한다.

virt-install \
  --import \
  --name my-vm \
  --osinfo ubuntu22.04 \
  --ram 2048 \
  --vcpus 2 \
  --disk  /opt/virtual_machine/my-vm.qcow2 \
  --disk  /opt/virtual_machine/my-new-disk.qcow2 \
  --graphics none \
  --network network=br-ex \
  --console pty,target.type=virtio \
  --autoconsole text


게시물 작성자: sejong.jeonjo@gmail.com


반응형


KVM, OpenStack, Kubernetes, OCP 등을 사용하다보면 VM에서 또는 Container 내부에서 CPU를 Pinning하거나 NUMA Node를 지정해야 할 경우가 있는데, 이런 CPU Pinning 설정/관리에 대한 내용을 기록해볼까~~~하고 마음을 먹었다. 그러나 너무 잘 작성한 블로그와 WebDocs가 있어서 그냥 Link만 걸어두기로 마음을 바꾸었다. :)


https://access.redhat.com/documentation/en-us/red_hat_enterprise_linux/5/html/virtualization/ch33s08


33.8. Setting KVM processor affinities Red Hat Enterprise Linux 5 | Red Hat Customer Portal

The Red Hat Customer Portal delivers the knowledge, expertise, and guidance available through your Red Hat subscription.

access.redhat.com


https://mhsamsal.wordpress.com/2020/05/12/how-to-perform-cpu-pinning-for-kvm-virtual-machines-and-docker-containers/


How to Perform CPU Pinning for KVM Virtual Machines and Docker Containers

Note: This post provides technical details for our paper “The Art of CPU-Pinning: Evaluating and Improving the Performance of Virtualization and Containerization Platforms” published in…

mhsamsal.wordpress.com


https://superuser.com/questions/1519358/qemu-kvm-cpu-pinning


QEMU/KVM cpu pinning

I have set up my VM with pci passthrough and now I am trying to set up cpupinning. How do I verify that it does in fact work? My config regarding cpu parameters: ... <vcpu placement="static">...

superuser.com


반응형


구성 환경


Host OS: Ubuntu

Hypervisor: KVM

VM(Guest): CentOS, Ubuntu, CoreOS 등 (Linux 계열)


우선 아래의 Web Docs를 보고 설정 및 테스트해보고, 잘 동작하면 여기에 테스트한 내용을 기록할 예정이다.


https://help.ubuntu.com/community/KVM%20-%20Using%20Hugepages


KVM - Using Hugepages - Community Help Wiki

Introduction The computer memory is divided in pages. The standard page size on most systems is 4KB. To keep track on what information is stored in which page, the system uses a page table. Searching in this page table is (in computer terms) a time costly

help.ubuntu.com


블로그 작성자: sejong.jeonjo@gmail.com


반응형


Host OS가 Ubuntu 20.04이고, 이 Host에 KVM을 설치했다.

그리고 이 KVM에서 PCI passthrough를 사용하는 방법을 정리해봤다.


참고: 이론적인 내용은 아래 블로그가 아주 쉽게 설명하고 있다.

https://www.nepirity.com/blog/kvm-gpu-passthrough/


KVM 기반의 GPU Passthrough 환경 - 네피리티

KVM 기반의 GPU Passthrough 환경 KVM 기반의 Hypervisor 에서 하드웨어 장치를 직접 Virtual Machine에게 할당하는 PassThrough 를 소개하고 환경 설정 방법에 대해서 설명드리도록 하겠습니다. PCI Passthrough는 NIC,

www.nepirity.com


PCI passthrough 사용을 위한 Host OS 설정


PCI passthrough를 사용하기 위해 아래 명령과 같이 Host OS를 설정한다.


##
## Grub 설정
##

$  cat /etc/default/grub

... 중간 생략 ...

GRUB_CMDLINE_LINUX_DEFAULT="quiet splash intel_iommu=on intel_iommu=igfx_off iommu=pt vfio-pci.ids=8086:1572"

... 중간 생략 ...

$  reboot

...
...
...


##
## Host OS가 Booting 되면, 아래와 같이 PCI에 관한 로그를 확인한다. "iommu=pt" 설정 확인
##

$  dmesg | grep -i vfio
[    0.000000] Command line: BOOT_IMAGE=/vmlinuz-5.4.0-94-generic root=UUID=7824a9ea-e59b-4796-9e23-75e3d909a001 ro quiet splash intel_iommu=on intel_iommu=igfx_off iommu=pt vfio-pci.ids=8086:1572 vt.handoff=7
[    4.136218] Kernel command line: BOOT_IMAGE=/vmlinuz-5.4.0-94-generic root=UUID=7824a9ea-e59b-4796-9e23-75e3d909a001 ro quiet splash intel_iommu=on intel_iommu=igfx_off iommu=pt vfio-pci.ids=8086:1572 vt.handoff=7
[   10.734658] VFIO - User Level meta-driver version: 0.3
[   10.814142] vfio_pci: add [8086:1572[ffffffff:ffffffff]] class 0x000000/00000000

...
...
...


$  lspci -k

... 중간 생략 ...

12:00.0 Ethernet controller: Intel Corporation Ethernet Controller X710 for 10GbE SFP+ (rev 02)
        Subsystem: Hewlett-Packard Company Ethernet 10Gb 2-port 562SFP+ Adapter
        Kernel driver in use: vfio-pci
        Kernel modules: i40e
12:00.1 Ethernet controller: Intel Corporation Ethernet Controller X710 for 10GbE SFP+ (rev 02)
        Subsystem: Hewlett-Packard Company Ethernet 10Gb 562SFP+ Adapter
        Kernel driver in use: vfio-pci
        Kernel modules: i40e

... 중간 생략 ...

$


PCI passthrough 사용을 위한 KVM 설정


##
## PCI passthrough할 NIC이 x710 드라이버를 사용한다고 가정하고
## 아래 설정 절차를 진행했다.
##

$  lspci | grep -i x710
12:00.0 Ethernet controller: Intel Corporation Ethernet Controller X710 for 10GbE SFP+ (rev 02)
12:00.1 Ethernet controller: Intel Corporation Ethernet Controller X710 for 10GbE SFP+ (rev 02)
af:00.0 Ethernet controller: Intel Corporation Ethernet Controller X710 for 10GbE SFP+ (rev 02)
af:00.1 Ethernet controller: Intel Corporation Ethernet Controller X710 for 10GbE SFP+ (rev 02)
$

##
## 위 출력된 내용 중에서 왼쪽 컬럼의 
##  12:00.0 
##  12:00.1
##  af:00.0
##  af:00.1
## 이 값을 이용하여 아래와 같이 KVM이 관리하는 device list를 확인한다.
##
##  참고:
##    nodedev-list로 출력된 device들은 모든 VM에서 공유해서 사용하는 device이므로
##    특정 VM에서 PCI device를 독점적으로 점유하려면, 아래 device를 KVM에서 detach하고
##    특정 VM의 HW에 아래 PCI device를 추가해주어야 PCI passthrough 효과를 얻을 수 있다.
##

$  virsh nodedev-list | grep 12_00
pci_0000_12_00_0
pci_0000_12_00_1
$  virsh nodedev-list | grep af_00
pci_0000_af_00_0
pci_0000_af_00_1
$

##
## PCI 슬롯 번호로 host에 등록된 PCI장비의 이름을 확인후 이 이름을 바탕으로 device 상제 정보를 확인한다.
## 아래 출력 내용 중에서 bus, slot, function 번호 확인 => KVM에서 VM의 device 추가할 때 필요하다.
##


root@bmt:~# virsh nodedev-dumpxml pci_0000_12_00_0
<device>
  <name>pci_0000_12_00_0</name>
  <path>/sys/devices/pci0000:11/0000:11:00.0/0000:12:00.0</path>
  <parent>pci_0000_11_00_0</parent>
  <driver>
    <name>vfio-pci</name>
  </driver>
  <capability type='pci'>
    <class>0x020000</class>
    <domain>0</domain>
    <bus>18</bus>
    <slot>0</slot>
    <function>0</function>
    <product id='0x1572'>Ethernet Controller X710 for 10GbE SFP+</product>
    <vendor id='0x8086'>Intel Corporation</vendor>
    <capability type='virt_functions' maxCount='64'/>
    <iommuGroup number='38'>
      <address domain='0x0000' bus='0x12' slot='0x00' function='0x0'/>
    </iommuGroup>
    <numa node='0'/>
    <pci-express>
      <link validity='cap' port='0' speed='8' width='8'/>
      <link validity='sta' speed='8' width='8'/>
    </pci-express>
  </capability>
</device>


root@bmt:~# virsh nodedev-dumpxml pci_0000_12_00_1
<device>
  <name>pci_0000_12_00_1</name>
  <path>/sys/devices/pci0000:11/0000:11:00.0/0000:12:00.1</path>
  <parent>pci_0000_11_00_0</parent>
  <driver>
    <name>vfio-pci</name>
  </driver>
  <capability type='pci'>
    <class>0x020000</class>
    <domain>0</domain>
    <bus>18</bus>
    <slot>0</slot>
    <function>1</function>
    <product id='0x1572'>Ethernet Controller X710 for 10GbE SFP+</product>
    <vendor id='0x8086'>Intel Corporation</vendor>
    <capability type='virt_functions' maxCount='64'/>
    <iommuGroup number='39'>
      <address domain='0x0000' bus='0x12' slot='0x00' function='0x1'/>
    </iommuGroup>
    <numa node='0'/>
    <pci-express>
      <link validity='cap' port='0' speed='8' width='8'/>
      <link validity='sta' speed='8' width='8'/>
    </pci-express>
  </capability>
</device>


root@bmt:~# virsh nodedev-dumpxml pci_0000_af_00_0
<device>
  <name>pci_0000_af_00_0</name>
  <path>/sys/devices/pci0000:ae/0000:ae:00.0/0000:af:00.0</path>
  <parent>pci_0000_ae_00_0</parent>
  <driver>
    <name>vfio-pci</name>
  </driver>
  <capability type='pci'>
    <class>0x020000</class>
    <domain>0</domain>
    <bus>175</bus>
    <slot>0</slot>
    <function>0</function>
    <product id='0x1572'>Ethernet Controller X710 for 10GbE SFP+</product>
    <vendor id='0x8086'>Intel Corporation</vendor>
    <capability type='virt_functions' maxCount='64'/>
    <iommuGroup number='151'>
      <address domain='0x0000' bus='0xaf' slot='0x00' function='0x0'/>
    </iommuGroup>
    <pci-express>
      <link validity='cap' port='0' speed='8' width='8'/>
      <link validity='sta' speed='8' width='8'/>
    </pci-express>
  </capability>
</device>


root@bmt:~# virsh nodedev-dumpxml pci_0000_af_00_1
<device>
  <name>pci_0000_af_00_1</name>
  <path>/sys/devices/pci0000:ae/0000:ae:00.0/0000:af:00.1</path>
  <parent>pci_0000_ae_00_0</parent>
  <driver>
    <name>vfio-pci</name>
  </driver>
  <capability type='pci'>
    <class>0x020000</class>
    <domain>0</domain>
    <bus>175</bus>
    <slot>0</slot>
    <function>1</function>
    <product id='0x1572'>Ethernet Controller X710 for 10GbE SFP+</product>
    <vendor id='0x8086'>Intel Corporation</vendor>
    <capability type='virt_functions' maxCount='64'/>
    <iommuGroup number='152'>
      <address domain='0x0000' bus='0xaf' slot='0x00' function='0x1'/>
    </iommuGroup>
    <pci-express>
      <link validity='cap' port='0' speed='8' width='8'/>
      <link validity='sta' speed='8' width='8'/>
    </pci-express>
  </capability>
</device>


##
## Host에서 위의 PCI Device를 detach한다.
##   참고: Host에 Attach된 nodedev는 VM에 Mount가 불가능하여 Detach해야 한다.
##        즉, 특정 VM에서만 위 PCI 장치를 전용해서 사용해야 하기 때문에
##        다수의 VM이 위 PCI 장비를 공유하지 못하도록 싹을 뽑아 버린다고 생각하면 된다.
##

$  virsh nodedev-detach pci_0000_12_00_0
Device pci_0000_12_00_0 detached

$  virsh nodedev-detach pci_0000_12_00_1
Device pci_0000_12_00_1 detached


위와 같이 KVM에서 Host 머신의 PCI 장치를 Detach했으면, 아래 KVM Virtual Manager 화면에서

특정 Virtual Machine 의 설정 화면을 열어본다.

그리고 이 Virtual Machine에 PCI Device를 추가한다. (아래 화면의 설정 순서를 따라할 것!!!) 


KVM Virt-Manager 에서 특정 VM의 HW 설정


위 설정 화면에서 [Finish] 버튼을 누르면, 아래 화면처럼 새로 추가한 PCI 장치 정보를 볼 수 있다.


VM의 HW 목록 및 설정 정보를 확인


위와 같이 Virtual Machine이 설정된 후에 VM 내부에서는 SR-IOV 구성까지 해야 NIC에 여러 VF를 생성하고, Application Process가 VF를 사용할 수 있을 것이다. (이후 과정에 나중에 테스트하면서 다시 기록할 생각이다) 


'Ubuntu' 카테고리의 다른 글

Epoch & Unix Time변환 (Date 변환)  (0) 2022.07.07
KVM의 VM에서 Hugepage 사용하기  (0) 2022.01.13
rc.local 활성 설정 (Ubuntu, CentOS)  (0) 2021.12.28
추가 장착한 Disk Mount  (0) 2021.12.28
Root 계정의 SSH 로그인 허용  (0) 2021.12.28
반응형

Macbook Pro에서 몇 년 동안 VirtualBox를 잘 사용했었는데,  갑자기 아래와 같은 rc=-1908 오류가 뜨면서 Virtual Machine (VM)이 기동하지 못 했다.


원인은 업그레이드할 때, 기존의 보안 설정이 초기화되서 그렇다.


아래 절차를 따라서 보안 설정(Security & Privacy)을 다시 해주면 된다.

(즉, 처음 VirtualBox를 설치했을 때처럼 보안 부분을 설정해주는 것이다)


(1) [Security & Privacy] 항목을 클릭한다.


(2) 아래 화면의 자물쇠 부분[Click the lock to prevent further changes]을 풀어준다.

      그리고 [Allow] 버튼을 Click한다.


이렇게 설정하고 mac OS를 Reboot하면, 예전처럼 VirtualBox의 VM이 잘 부팅된다.

+ Recent posts