반응형
작성일: 2026년 3월 5일


Linux kernel source code를 다운로드하기

git clone --depth 1 https://git.kernel.org/pub/scm/linux/kernel/git/torvalds/linux.git


위 git 명령은 최신 mainline 코드를 가져온다.

방금 다운로드한 kernel version을 확인하려면, Makefile을 열어서 파일 내용의 위 5줄을 읽어야 한다.

$ cat Makefile

VERSION = 7
PATCHLEVEL = 0
SUBLEVEL = 0
EXTRAVERSION = -rc2
NAME = Baby Opossum Posse

... 중간 생략 ...


만약 특정 version의 kernel source  code를 가져와서 build하고 싶다면, 아래 예시와 같이 `git fetch` 명령을 실행해야 한다. 

$ git fetch origin tag v6.19 --no-tags
$ git checkout v6.19

## 또는 아래와 같이 처음부터 `git clone`할 때, 특정 tag를 지정해서 가져온다.
$ git clone --depth 1 --branch v6.19 https://git.kernel.org/pub/scm/linux/kernel/git/torvalds/linux.git linux-6.19


Kernel source code를 build하기 위해 필요한 utility program을 설치하기

sudo apt install -y build-essential libncurses-dev bison flex libssl-dev libelf-dev libdw-dev dwarves bc pkg-config rsync cpio zstd


Kernel source code를 Compile하기

`make menuconfig` 명령을 실행하여 필요한 빌드 옵션을 On/Off 설정한다.

`make munuconfig` 화면에서 build option을 설정했으면, Signature 체크용 인증서 정보를 삭제한다. (아래 명령을 참고)

./scripts/config --set-str SYSTEM_TRUSTED_KEYS "" --set-str SYSTEM_REVOCATION_KEYS ""


`make` 명령을 수행한다.

source code 분량이 많기 때문에 -j 옵션을 추가하여 make 명령을 수행해야 한다.

-j 옵션이 없는 상태로 compile하면, 하루 종일 build해야 한다.

make -j$(nproc)

또는 

make -j2


Tip: 참고할 내용

Kernel source code Build에 걸리는 시간:

[ CPU 8 Core를 사용할 때 ]

  - HW 사양: Intel i7-11700 @ 2.50GHz

  - Build time: 32분 걸림

[ CPU 1 Core를 사용할 때 ]

  - HW 사양: Intel i7-11700 @ 2.50GHz

  - Build time: 3시간 40분 걸림


Build된 kernel binary file을 Machine에 적용하는 방법

1. Module 설치

sudo make modules_install

위 명령은 .ko module file을 /lib/modules/6.19.0/ 같은 directory에 복사한다.


2. Kernel 설치 (Kernel image 복사, Grub 설정 변경)

sudo make install

위 명령은 bzImage 파일과 System.map 파일을 /boot directory에 복사하고

Ubuntu/Debian 같은 배포판 리눅스에서는 /sbin/installkernel 스크립트를 이용하여 initramfs 파일을 생성하고 update-grub 절차까지 수행한다.


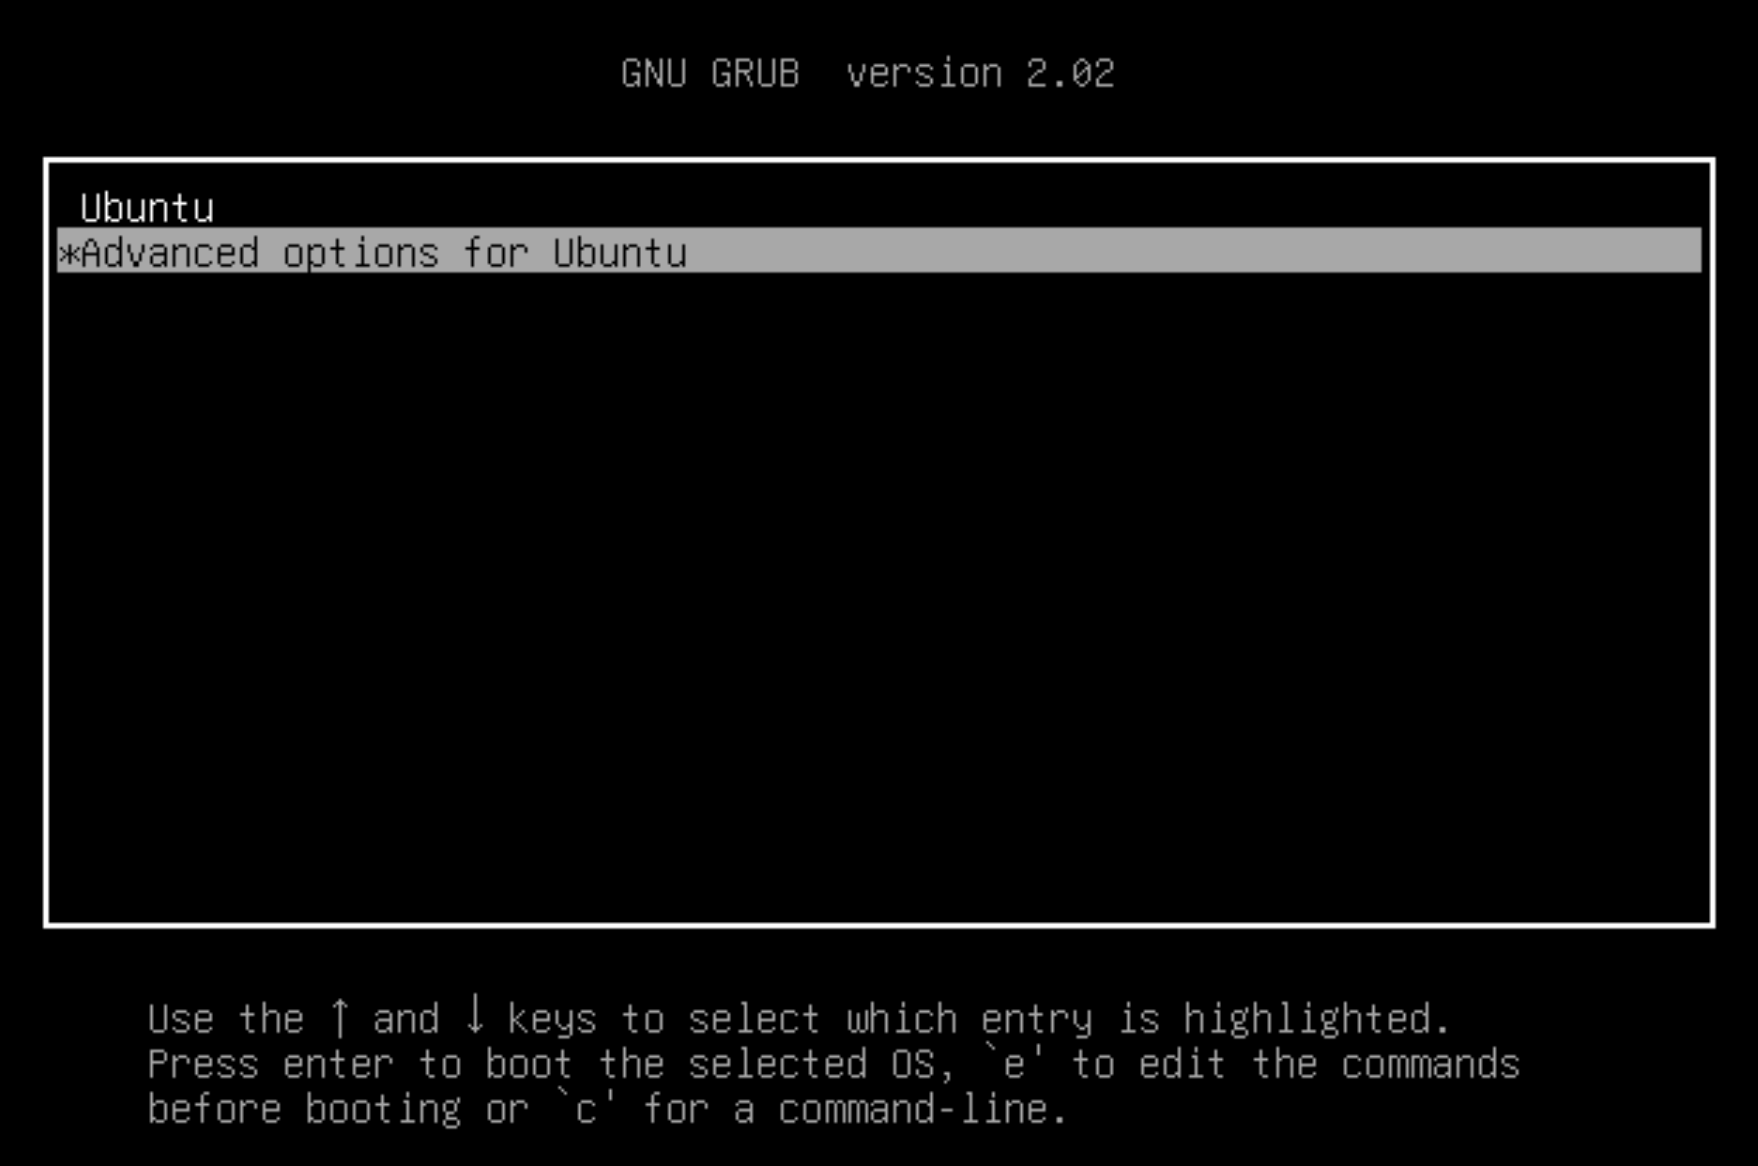
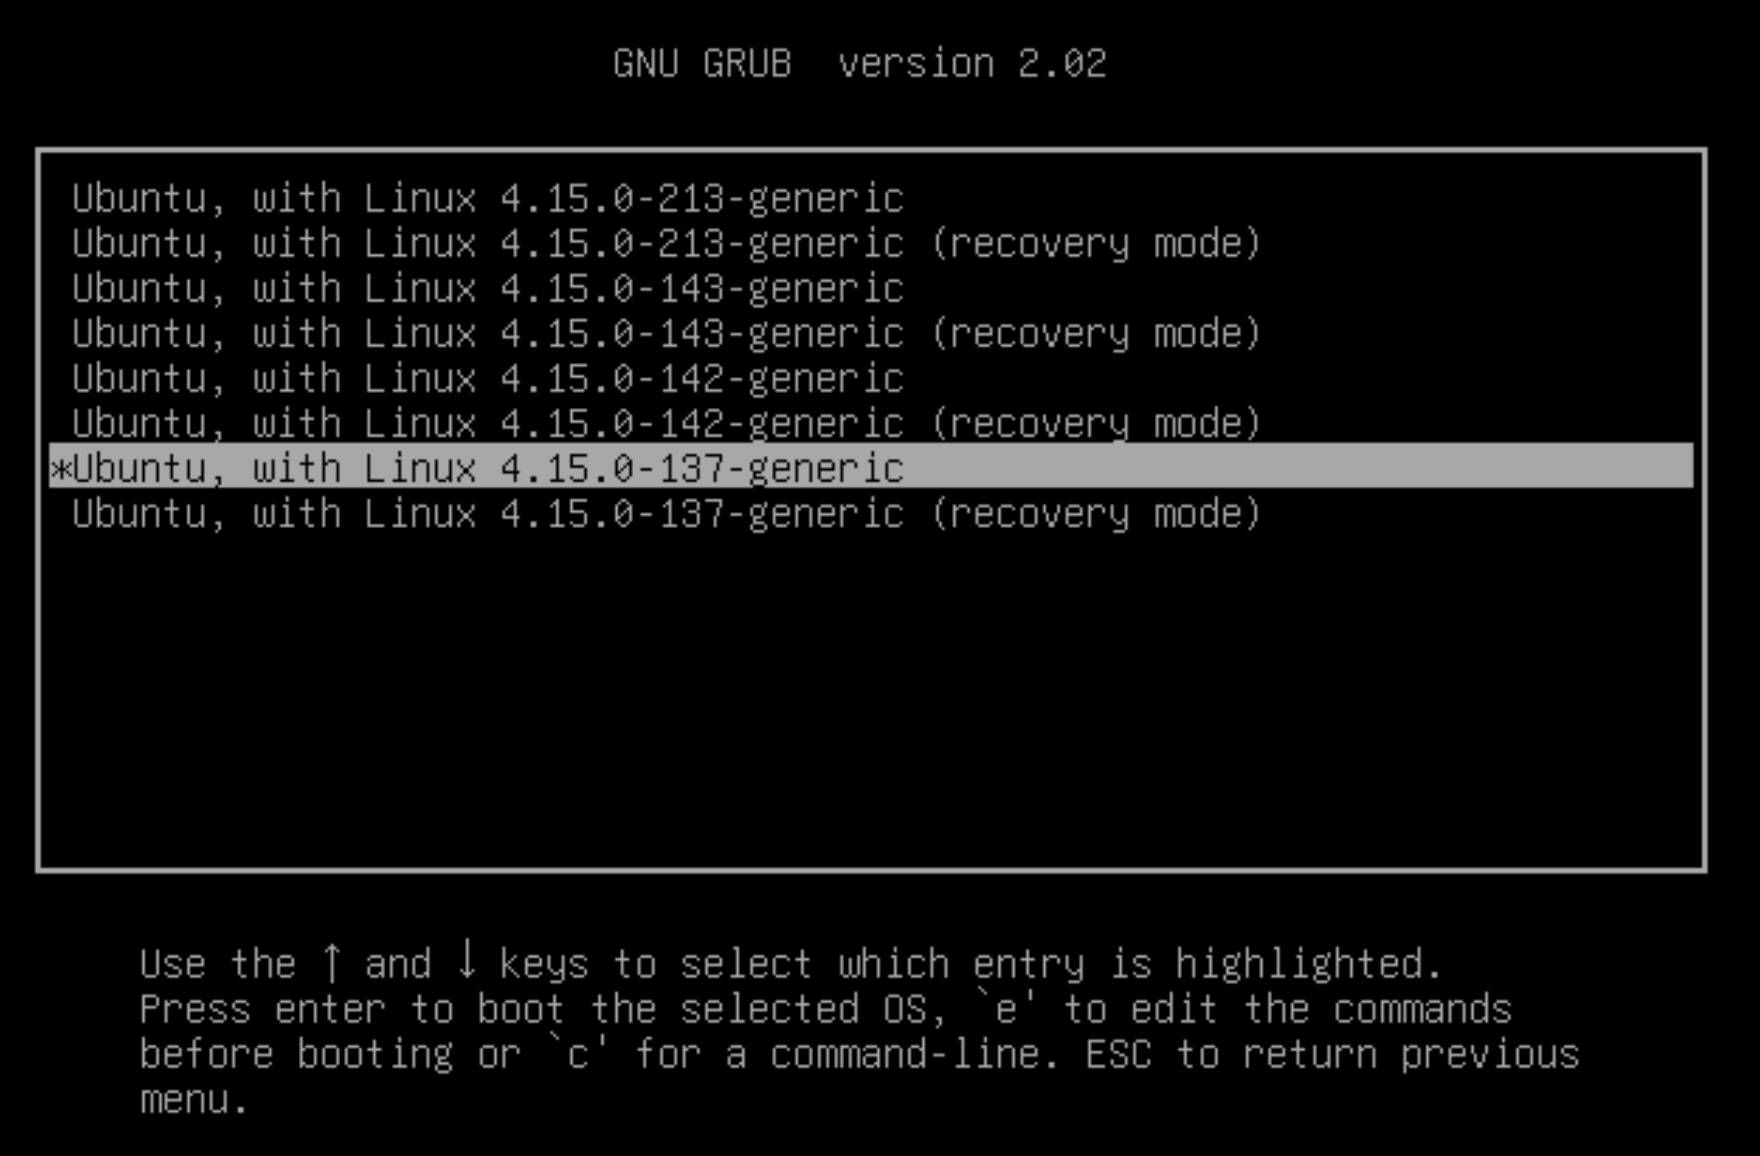
3. Reboot 후 새 kernel 선택

sudo reboot

컴퓨터가 reboot되면서, GRUB 화면이 보일 것이다.

이때 [ Advanced options ] - [ Linux 6.19.0 ] 을 선택하고, OS booting 과정을 진행하면 된다.


4. 새 kernel 적용 여부 확인

$ uname -r
6.19.0-11-generic


내가 build한 kernel version과 같은지 확인한다.

반응형
작성일: 2025년 11월 25일


Ubuntu 22.04, Ubuntu 24.04를 사용하면서 절전모드(Suspend Mode, Sleep Mode)와 관련한 문제를 만나게 되었다.

예를 들어, Ubuntu 24.04가 절전모드로 바뀌었다가 다시 깨어날 때, Intel I225-V NIC가 인식되지 않는 경우가 있다.


이런 경우는 Kernel에서 해당 Hardware와 관련한 kernel module을 제거했다가 다시 추가하면 문제가 해결된다.

그런데 매번 Ubuntu OS가 Suspend mode에서 깨어날 때마다 `modprobe -r igc && modprobe  igc` 같은 명령을 입력하기는 번거롭다.

그래서 아래처럼 설정 파일을 작성해 놓으면, Suspend mode에서 깨어날 때 자동으로 Kernel module을 제거, 추가하는 것을 자동화할 수 있다.


$ cat /etc/systemd/system/i225-fix.service

[Unit]
Description=Fix for Intel I225-V after suspend
After=suspend.target

[Service]
Type=oneshot
ExecStart=/bin/sh -c "/sbin/modprobe -r igc && /sbin/modprobe igc"

[Install]
WantedBy=suspend.target

$


위와 같이 설정 파일을 작성하고 테스트 삼아서 Ubuntu OS를 Suspend mode(절전 모드)로 바꾸었다가 다시 깨워보자.

네트워크 포트가 잘 인식되는 것을 볼 수 있을 것이다.


반응형
작성일: 2025년 1월 10일


Linux kernel source code를 다운로드하는 방법

GitHub에서 Git Clone하기

$ git clone https://git.kernel.org/pub/scm/linux/kernel/git/stable/linux.git


참고: github에서 clone하면, 다운로드 시간이 엄청 길다. 내 경우는 10분 소요되었다.


Tar 파일로 다운로드하기

아래 Linux Kernel 공식 Archive 홈페이지에서 원하는 Linux 버전의 소스 코드에 대한 Tar 파일을 다운로드.

https://www.kernel.org


반응형
작성일: 2024년 8월 13일


특정 버전의 Linux Kernel 설치하기

apt 명령으로 아래와 같은 특정 kernel version을 설치한다.

예를 들어, linux kernel version 4.15.0-137 을 설치한다면, 아래 예제 명령과 같이 실행한다.

$ apt-get install linux-image-4.15.0-137-generic \
                  linux-headers-4.15.0-137-generic \
                  linux-modules-4.15.0-137-generic \
                  linux-modules-extra-4.15.0-137-generic


GRUB 설정하기

새로운 Linux kernel version이 설치되었다고 해서, 새로 설치한 Kernel version으로 부팅되는 것이 아니다.

GRUB 설정을 수정해야 내가 원하는 linux kernel version으로 부팅된다.

아래 예제 GRUB 파일과 같이 수정하면 된다.

$ vi /etc/default/grub

... 중간 생략 ...

## 방금 새로 설치한 linux kernel version에 대한 이름을 설정한다.
GRUB_DEFAULT='Advanced options for Ubuntu>Ubuntu, with Linux 4.15.0-137-generic'

## 아래와 같이 설정하면, 3초 동안 countdown하는 화면이 나온다.
## countdown하는 동안에 'ESC or F4 or SHIFT' 키를 누르면 GRUB 부팅 설정이 나온다.
## 이때 Default kernel version이 아닌 다른 kernel version을 고를 수 있다.
GRUB_TIMEOUT_STYLE=countdown
GRUB_TIMEOUT=3

... 중간 생략 ...


grub 설정 파일을 저장하고, 아래와 같이 update-grub 명령을 수행한다.

$ update-grub

Sourcing file `/etc/default/grub'
Generating grub configuration file ...
Found linux image: /boot/vmlinuz-4.15.0-213-generic
Found initrd image: /boot/initrd.img-4.15.0-213-generic
Found linux image: /boot/vmlinuz-4.15.0-143-generic
Found initrd image: /boot/initrd.img-4.15.0-143-generic
Found linux image: /boot/vmlinuz-4.15.0-142-generic
Found initrd image: /boot/initrd.img-4.15.0-142-generic
Found linux image: /boot/vmlinuz-4.15.0-137-generic
Found initrd image: /boot/initrd.img-4.15.0-137-generic
done

$


Linux OS를 reboot

아래와 같이 reboot 명령을 수행하고, 부팅 초기에 "countdown" 화면이 나오면

[ESC] 또는 [SHIFT] 또는 [F4] 키를 눌러서 원하는 Linux kernel version을 선택한다.

$ reboot


GNU GRUB 화면 (Linux kernel version 선택)


GNU GRUB 화면 (Linux kernel version 선택)


Linux kernel version의 적용 여부 확인

아래와 같이 `uname -sr` 명령으로 새로 설치한 linux kernel version으로 부팅되었는지 확인한다.

$ uname -sr
Linux 4.15.0-137-generic
$


반응형

"커널연구회"의 자료를 참고!


https://www.kernel.bz/blogPost/kernel-mov-list


커널 소스 분석 문서 및 동영상 강의 목록


kernel.bz


http://www.iamroot.org/


iamroot.org - IT 스터디

kernel, xen, kvm, gcc, ai 스터디 그룹

www.iamroot.org


http://www.iamroot.org/xe/index.php?mid=Study&document_srl=215076 


커널 스터디를 위한 문c 가이드입니다. - 스터디 - iamroot.org

안녕하세요? 문c 블로그(http://jake.dothome.co.kr)의 문영일입니다.   한 달 후면 여러분들이 1년간 기다리셨던 18차 커널 스터디가 시작됩니다. 커널 스터디를 통한 과실은 이미 많은 분들이 들어보

www.iamroot.org


http://jake.dothome.co.kr/


문c 블로그

최신 ARM 리눅스 5.x 커널 분석

jake.dothome.co.kr


https://hyeyoo.com/80


[kernel/locking] spinlock (1) - spinlock 사용법

앞선 글에서 lock이란 무엇이고, lock의 필요성에 대해서 알아보았다. 이번 글에서는 가장 기본적인 spinlock을 리눅스 커널에서 어떻게 구현했는지 알아볼 것이다. 우선 관련된 개념을 몇 가지 살펴

hyeyoo.com


https://pr0gr4m.github.io/


Linux Kernel Analysis

Linux Kernel Blog

pr0gr4m.github.io


반응형


참고 문서:
  "문c 블로그 - RCU(Read Copy Update)"
  http://jake.dothome.co.kr/rcu/


참고 문서: 
  "리눅스 커널 RCU 이해 / 커널연구회"
  https://kernel.bz/boardPost/118679/20


반응형


작성일: 2023년 8월 1일


NAVER D2 자료 - TCP/IP Network Stack 이해하기

https://d2.naver.com/helloworld/47667


반응형

아래 예시는 Linux OS에 Hugepage를 적용하는 절차이다.

##
## /etc/default/grub 파일에서  
## default_hugepagesz, hugepagesz, hugepages, transparent_hugepage
## 항목을 추가 설정한다.
## (아래 예시를 참고)
##

$ cat  /etc/default/grub

GRUB_TIMEOUT=5
GRUB_DISTRIBUTOR="$(sed 's, release .*$,,g' /etc/system-release)"
GRUB_DEFAULT=saved
GRUB_DISABLE_SUBMENU=true
GRUB_TERMINAL_OUTPUT="console"
GRUB_CMDLINE_LINUX="crashkernel=auto rhgb quiet default_hugepagesz=1GB hugepagesz=1G hugepages=320 transparent_hugepage=never"
GRUB_DISABLE_RECOVERY="true"
GRUB_ENABLE_BLSCFG=true

$

##
## 위와 같이 /etc/default/grub 파일을 수정하고,
## grub2 명령으로 설정을 적용한다.
##

## Case: UEFI Mode
$ grub2-mkconfig -o /boot/efi/EFI/redhat/grub.cfg

## Case: Legacy BIOS Mode
$ grub2-mkconfig -o /boot/grub2/grub.cfg

##
## 위와 같이 설정 작업을 마무리했으면, OS를 Reboot하여 설정을 반영한다.
##

$ reboot

+ Recent posts