반응형
작성일: 2024년 8월 7일
Ubuntu 24.04 또는 Ubuntu 22.04에 Samba(SMB) 서버를 설치하고 싶다면 아래 절차를 따라하면 잘 동작한다.
##
##  Samba 서버 프로그램을 설치한다.
##
$  sudo apt-get update

$  sudo apt-get install -y samba

...

##
##  Samba 서버가 공유할 폴더(디렉토리) 정보를 설정한다.
##
$  vi /etc/samba/smb.conf
... 중간 생략 ...
;
; 아래 내용을 추가한다.
;
[mybox]
   comment = My File Box
   path = /home/sejong
   guest ok = no
   browseable = yes
   writable = yes
   create mask = 0777
   directory mask = 0777
   valid users = sejong
... 중간 생략 ...

##
## Linux 계정 'sejong'을 samba 접근 계정으로 추가한다.
## 암호는 Linux 계정 'sejong'의 암호와 달라도 된다.
##
$  sudo smbpasswd -a sejong

##
## Samba 서버 데몬을 재기동한다.
##
$  sudo /etc/init.d/smbd restart
## 또는 위 명령을 아래와 같이 수행해도 된다.
##  $ sudo  systemctl restart smbd
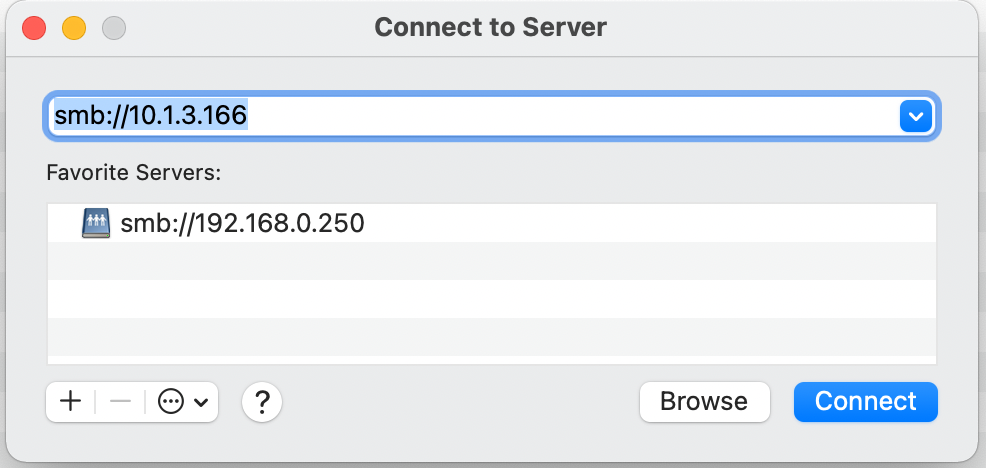
클라이언트 PC에서 아래와 같이 Samba 서버에 접속시도한다. (아래는 Macbook에서 실행한 화면)
Samba 서버 설정 끝 !!!
Samba 서버 관리 명령을 알고 싶다면, 아래 내용을 더 읽어보아요~~
Samba 계정 정보를 보고 싶다면, 아래와 같이 `pdbedit` 명령으로 조회할 수 있다.
$  pdbedit -L -v

---------------
Unix username:        sejong
NT username:
Account Flags:        [U          ]
Home Directory:       \\ANDREW-UBUNTU\sejong
HomeDir Drive:
Logon Script:
Profile Path:         \\ANDREW-UBUNTU\sejong\profile
Domain:               ANDREW-UBUNTU
Account desc:
Workstations:
Munged dial:
Logon time:           0
Logoff time:          Thu, 07 Feb 2036 00:06:39 KST
Kickoff time:         Thu, 07 Feb 2036 00:06:39 KST
Password last set:    Wed, 07 Dec 2022 16:06:30 KST
Password can change:  Wed, 07 Dec 2022 16:06:30 KST
Password must change: never
Last bad password   : 0
Bad password count  : 0
Logon hours         : FFFFFFFFFFFFFFFFFFFFFFFFFFFFFFFFFFFFFFFFFF

$
Samba 서버에 접속한 Client 정보를 보고 싶다면 아래와 같이 `smbstatus` 명령을 사용한다.
$  smbstatus

Samba version 4.15.9-Ubuntu
PID     Username     Group        Machine                                   Protocol Version  Encryption           Signing
----------------------------------------------------------------------------------------------------------------------------------------
295419  sejong       sejong       10.1.3.169 (ipv4:10.1.3.169:63352)        SMB3_11           -                    partial(AES-128-CMAC)

Service      pid     Machine       Connected at                     Encryption   Signing
---------------------------------------------------------------------------------------------
mybox        295419  10.1.3.169    Wed Dec  7 04:23:23 PM 2022 KST  -            -


Locked files:
Pid          User(ID)   DenyMode   Access      R/W        Oplock           SharePath   Name   Time
--------------------------------------------------------------------------------------------------
295419       1001       DENY_NONE  0x100081    RDONLY     NONE             /home/sejong   .   Wed Dec  7 16:23:22 2022
계정 정보를 변경하고 싶다면, `usermod` 명령을 사용한다.
$  usermod --help
Usage: usermod [options] LOGIN

Options:
  -b, --badnames                allow bad names
  -c, --comment COMMENT         new value of the GECOS field
  -d, --home HOME_DIR           new home directory for the user account
  -e, --expiredate EXPIRE_DATE  set account expiration date to EXPIRE_DATE
  -f, --inactive INACTIVE       set password inactive after expiration
                                to INACTIVE
  -g, --gid GROUP               force use GROUP as new primary group
  -G, --groups GROUPS           new list of supplementary GROUPS
  -a, --append                  append the user to the supplemental GROUPS
                                mentioned by the -G option without removing
                                the user from other groups
  -h, --help                    display this help message and exit
  -l, --login NEW_LOGIN         new value of the login name
  -L, --lock                    lock the user account
  -m, --move-home               move contents of the home directory to the
                                new location (use only with -d)
  -o, --non-unique              allow using duplicate (non-unique) UID
  -p, --password PASSWORD       use encrypted password for the new password
  -R, --root CHROOT_DIR         directory to chroot into
  -P, --prefix PREFIX_DIR       prefix directory where are located the /etc/* files
  -s, --shell SHELL             new login shell for the user account
  -u, --uid UID                 new UID for the user account
  -U, --unlock                  unlock the user account
  -v, --add-subuids FIRST-LAST  add range of subordinate uids
  -V, --del-subuids FIRST-LAST  remove range of subordinate uids
  -w, --add-subgids FIRST-LAST  add range of subordinate gids
  -W, --del-subgids FIRST-LAST  remove range of subordinate gids
  -Z, --selinux-user SEUSER     new SELinux user mapping for the user account
게시물 작성자: sejong.jeonjo@gmail.com
##
## 채용 관련 글
##
제가 일하고 있는 기업 부설연구소에서 저와 같이 연구/개발할 동료를 찾고 있습니다.
(이곳은 개인 블로그라서 기업 이름은 기재하지 않겠습니다. E-mail로 문의주시면 자세한 정보를 공유하겠습니다.)

근무지 위치:
  서울시 서초구 서초동, 3호선 남부터미널역 근처 (전철역 출구에서 회사 입구까지 도보로 328m)
필요한 지식 (아래 내용 중에서 70% 정도를 미리 알고 있다면 빠르게 협업할 수 있음):
  - 운영체제 (학부 3~4학년 때, 컴퓨터공학 운영체제 과목에서 배운 지식 수준):
    예를 들어, Processor, Process 생성(Fork)/종료, Memory, 동시성, 병렬처리, OS kernel driver
  - Linux OS에서 IPC 구현이 가능
    예를 들어, MSGQ, SHM, Named PIPE 등 활용하여 Process간 Comm.하는 기능 구현이 가능하면 됨.
  - Algorithm(C언어, C++ 언어로 구현 가능해야 함)
    예를 들어, Hashtable, B-Tree, Qsort 정도를 C 또는 C++로 구현할 수 있을 정도
  - Network 패킷 처리 지식(Layer 2 ~ 4, Layer 7)
    예를 들어, DHCP Server/Client의 주요 Feature를 구현할 정도의 능력이 있으면 됨.
  - Netfilter, eBPF 등 (IP packet hooking, ethernet packet 처리, UDP/TCP packet 처리)
  - IETF RFC 문서를 잘 읽고 이해하는 능력 ^^
  # 위에 열거한 내용 외에도 제가 여기 블로그에 적은 내용들이 대부분 업무하면서 관련이 있는 주제를 기록한 것이라서
  # 이 블로그에 있는 내용들을 잘 알고 있다면, 저희 연구소에 와서 연구/개발 업무를 수행함에 있어서 어려움이 없을 겁니다.
회사에서 사용하는 프로그래밍 언어:
  - 프로그래밍 언어: C, C++, Go
    (참고: 아직 연구소 동료들이 Rust를 사용하진 않습니다만, 새 언어로써 Rust를 사용하는 것을 고려하는 중)
근무 시간:
  - 출근: 8~10시 사이에서 자유롭게 선택
  - 퇴근: 8시간 근무 후 퇴근 (오후 5시 ~ 7시 사이)
  - 야근 여부: 거의 없음 (내 경우, 올해 상반기 6개월간 7시 이후에 퇴근한 경우가 2회 있었음)
  - 회식 여부: 자유 (1년에 2회 정도 회식하는데, 본인이 집에 가고 싶으면 회식에 안 감. 왜 참석 안 하는지 묻지도 않음)
외근 여부:
  - 신규 프로젝트 멤버 -> 외근 전혀 하지 않음 (나는 신규 프로젝트만 참여해서 지난 1년 동안 한번도 외근 없었음)
  - 상용 프로젝트 멤버 -> 1년에 5회 미만 정도로 외근
팀 워크샵 여부:
  - 팀 워크샵 자체를 진행하지 않음. (워크샵 참석하는 거 싫어하는 개발자 환영 ^^)
연락처:
  - "sejong.jeonjo@gmail.com"  # 궁금한 점은 이 연락처로 문의주세요.
  - 블로그 비밀 댓글 (제가 하루에 한번씩 댓글 확인하고 있음)
원하는 인재상:
  - 우리 부설연구소는 "긴 호흡으로 프로젝트를 진행"하기 때문에 최소 2년간 한 가지 주제를 꾸준하게 연구/개발할 수 있는 개발자를 원함.
  - 우리 부설연구소는 자주적으로 연구 주제를 찾아서 업무를 하기 때문에 능동적으로 생각하고 행동하는 동료를 원함.
  - 차분하게 연구 주제에 몰입하고, 해법을 찾는 것을 즐기는 사람.
내가 느끼는 우리 연구소의 장점:
  - 갑/을 관계가 없음. (제가 근무하고 있는 연구소는 SI업종이 아니라서 갑/을 회사 개념이 없음)
  - 연구소 자체적으로 연구 주제를 발굴하고 시스템을 개발하기 때문에 개발 일정에 대한 스트레스가 적음
  - 빌딩 전체를 우리 회사가 사용하므로 분위기가 산만하지 않음.
  - 근처에 예술의전당, 우면산 둘레길이 있어서 점심 시간에 산책하기 좋음 ^^
  - 연구소 동료들 매너가 Good (2년간 일하면서 한번도 감정에 스크레치 생기거나 얼굴 붉히며 싸운 적 없음 ^^)
'Ubuntu' 카테고리의 다른 글
| Linux 시스템 모니터링 툴(CPU 온도, Process 별 I/O와 Network Traffic) (0) | 2024.08.14 |
|---|---|
| Ubuntu에서 Linux Kernel Version 변경 (0) | 2024.08.13 |
| Ubuntu 24.04 (Noble Numbat) 설치 (0) | 2024.08.07 |
| Ubuntu 22.04 (24.04) 한글 입력기 설정 (한영 변환 설정) (4) | 2024.08.07 |
| Linux OS(Ubuntu) Hardware 정보 조회 명령 (inxi) (0) | 2024.06.19 |